The life of a distributed task instance
Discover what happens when Apache Airflow performs task distribution on Celery workers through RabbitMQ queues.
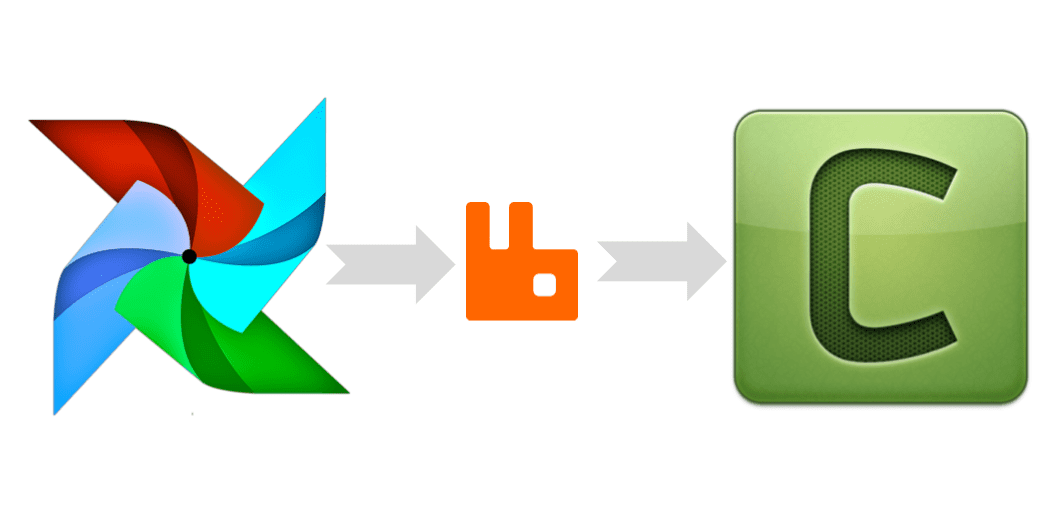
Apache Airflow is a tool to create workflows such as an extract-load-transform pipeline on AWS. A workflow is a directed acyclic graph (DAG) of tasks and Airflow has the ability to distribute tasks on a cluster of nodes. Let’s see how it does that.
RabbitMQ is a message broker. Its job is to manage communication between multiple services by operating message queues. It provides an API for other services to publish and to subscribe to the queues.
Celery is a task queue. It can distribute tasks on multiple workers by using a protocol to transfer jobs from the main application to Celery workers. It relies on a message broker to transfer the messages.
Inside Apache Airflow, tasks are carried out by an executor. The main types of executors are:
- Sequential Executor: Each task is run locally (on the same machine as the scheduler) in its own python subprocess. They are run sequentially which means that only one task can be executed at a time. It is the default executor.
- Local Executor: It is the same as the sequential executor except that multiple tasks can run in parallel. It needs a metadata database (where DAGs and tasks status are stored) that supports parallelism like MySQL. Setting such a database requires some extra work since the default configuration uses SQLite.
- Celery Executor: The workload is distributed on multiple celery workers which can run on different machines. It is the executor you should use for availability and scalability.
Distributed Apache Airflow Architecture
Apache Airflow is split into different processes which run independently from each other.
When setting up Apache Airflow with the celery executor to use a distributed architecture, you have to launch a bunch of these processes and other services:
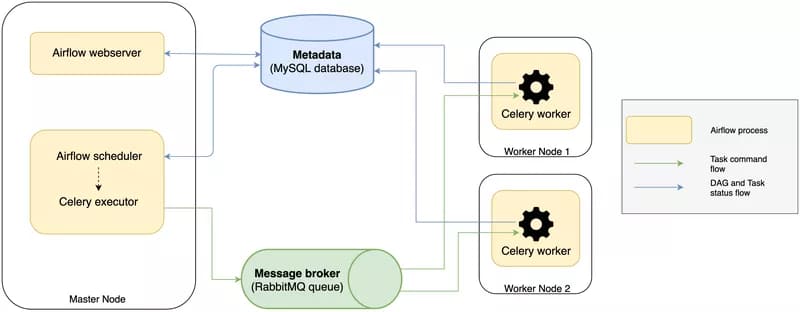
- A metadata database (MySQL): it contains the status of the DAG runs and task instances.
- Airflow web server: a web interface to query the metadata to monitor and execute DAGs.
- Airflow scheduler: checks the status of the DAGs and tasks in the metadata database, create new ones if necessary and sends the tasks to the queues.
- A message broker (RabbitMQ): it stores the task commands to be run in queues.
- Airflow Celery workers: they retrieve the commands from the queues, execute them and update the metadata.
You can look at Clairvoyant blog to set up everything.
In the end, a typical architecture looks like:
Journey of a task instance
Let’s now dive deeper into each step to understand the complete process and to know how to monitor and debug them.
1. In the beginning, the scheduler creates a new task instance in the metadata database with the scheduled state:
[
{
"#": 1,
"task_id": "Hello_World",
"dag_id": "tutorial",
"execution_date": "2019-03-24 14:52:56.271392",
"start_date": "",
"end_date": "",
"duration": "",
"state": "scheduled",
"queue": "default",
"queued_dttm": "",
}
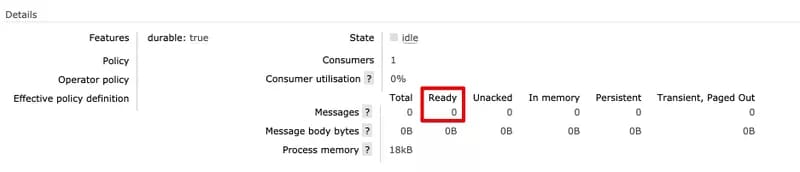
]2. Then the scheduler uses the Celery Executor which sends the task to the message broker. RabbitMQ queues can be explored from the management UI on port 15672. You can see the number of messages in the queue and open each message.
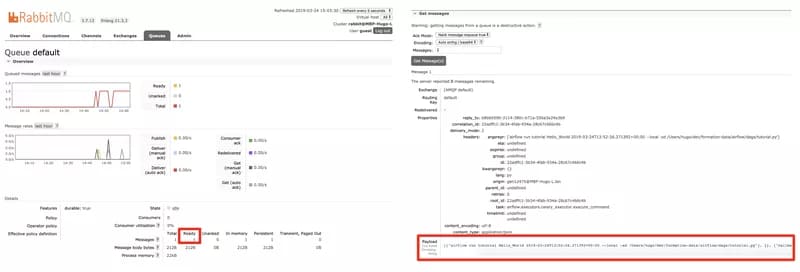
If you look closely at the payload created by the Celery Executor, you will see that it contains the command that the celery worker should execute:
airflow run tutorial Hello_World 2019-03-24T13:52:56.271392+00:00
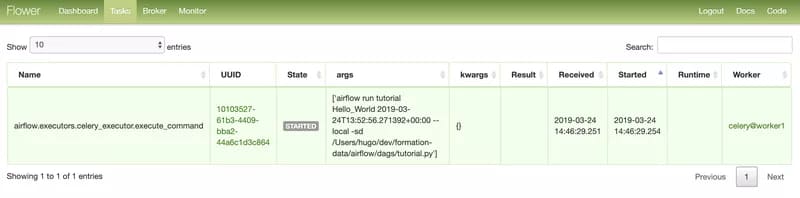
3. The celery worker then receives the command from the queue. It is now empty.
4. The celery worker updates the metadata to set the status of the task instance to running:
[
{
"#": 1,
"task_id": "Hello_World",
"dag_id": "tutorial",
"execution_date": "2019-03-24 14:52:56.271392",
"start_date": "2019-03-24 15:17:24.756170",
"duration": "",
"state": "running",
"queue": "default",
"queued_dttm": "2019-03-24 14:53:37.838453",
}
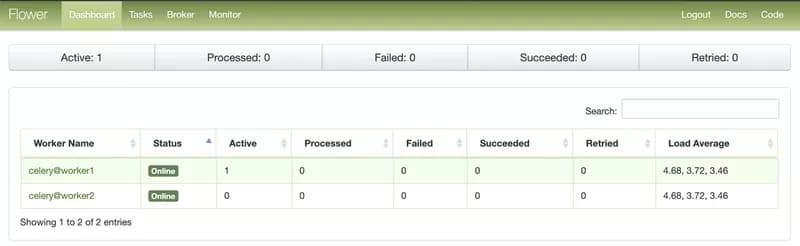
]5. The celery worker executes the command. The worker status can be monitored from the Flower web interface by running airflow flower. It is a simple web server on which celery workers regularly report their status.
6. Once the task is finished, the celery worker updates the metadata to set the status of the task instance to success:
[
 {
   "#": 1,
   "task_id": "Hello_World",
   "dag_id": "tutorial",
   "execution_date": "2019-03-24 14:52:56.271392",
   "start_date": "2019-03-24 15:17:24.756170",
   "end_date": "2019-03-24 15:17:25.865466",
   "duration": 1.1093,
   "state": "success",
   "queue": "default",
   "queued_dttm": "2019-03-24 14:53:37.838453",
 }
]
That’s it. The task is now complete. If other ones depend on its completion, they will now be created by the scheduler and follow the same process.
Multiple Celery workers
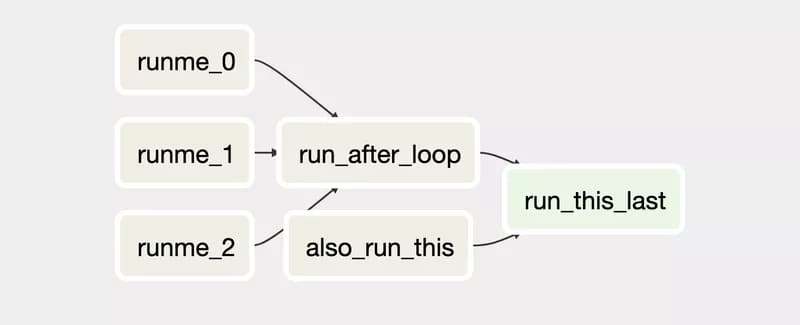
Obviously, what we want to achieve with a Celery Executor is to distribute the workload on multiple nodes. It only makes sense if multiple tasks are running at the same time. Let’s try with a simple DAG:
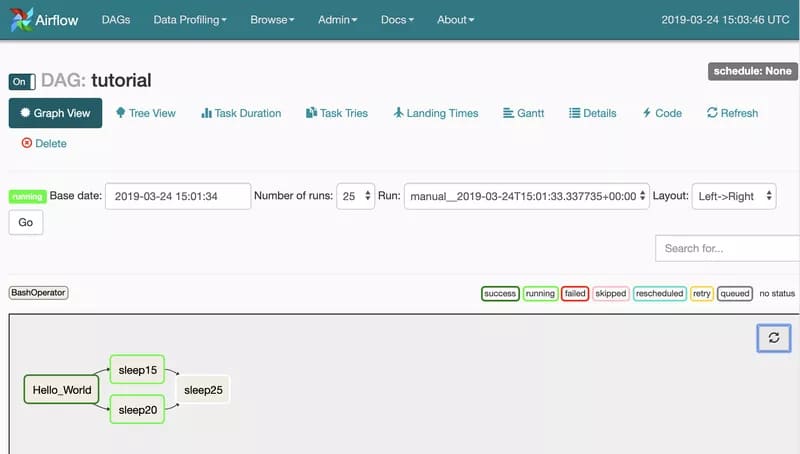
In our example, just after the Hello_World task is completed, the scheduler pushes both sleep15 and sleep20 tasks to the queue to be executed by the celery workers.
We can check with Flower that each celery worker received one task from the queue and that they are executing their assigned task simultaneously:
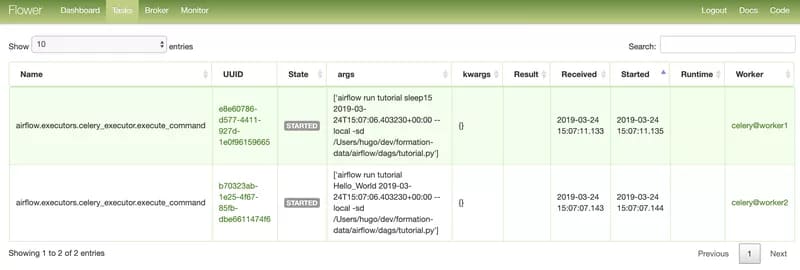
The scheduler now waits for both tasks to be reported as successful before sending the next one to the queue.
Conclusion
I hope you now have a clearer understanding of all the execution steps of task distribution with Apache Airflow.
If you need help, please post a comment or ask the community on the Apache Airflow Slack.
Thanks to Flavian Hautbois, Florian Carra, and Alexandre Sapet.
Are you looking for Data Engineering expert's ? Don't hesitate to contact us !